

phpMyAdmin là một công cụ miễn phí viết bằng PHP để quản trị MySQL thông qua trình duyệt web. Bài viết này sẽ giúp các bạn cài đặt phpMyAdmin với Apache.
Cài đặt phpMyAdmin với Apache – phpMyAdmin là một công cụ nguồn mở miễn phí được viết bằng PHP để quản trị MySQL thông qua trình duyệt web. Nó có thể thực hiện nhiều tác vụ như tạo, sửa đổi hoặc xóa bỏ cơ sở dữ liệu, bảng, các trường hoặc bản ghi; thực hiện báo cáo SQL; hoặc quản lý người dùng và cấp phép truy cập database.
Trong bài viết này, VINASTAR sẽ hướng dẫn các bạn Cài đặt phpMyAdmin với Apache trên CentOS 7.
Cài đặt phpMyAdmin với Apache trên CentOS 7
1. Yêu cầu
VPS sử dụng hệ điều hành CentOS và đã được cài đặt Apache, PHP, và MariaDB
2. Cài đặt phpMyAdmin trên CentOS
Để cài đặt PhpMyAdmin các bạn chỉ cần chạy lần lượt các lệnh sau
cd /usr/share
wget https://files.phpmyadmin.net/phpMyAdmin/5.0.2/phpMyAdmin-5.0.2-all-languages.zip
unzip phpMyAdmin-5.0.2-all-languages.zip
mv phpMyAdmin-5.0.2-all-languages phpMyAdmin
rm -rf phpMyAdmin-5.0.2-all-languages.zip
rm -rf /usr/share/phpMyAdmin/setup
Các bạn có thể truy cập phpmyadmin.net để lấy link download phiên bản phpMyAdmin mới nhất.
3. Cấu hình phpMyAdmin
File cấu hình của PhpMyadmin là file config.inc.php. Trước tiên các bạn cần chạy lệnh sau
mv /usr/share/phpMyAdmin/config.sample.inc.php /usr/share/phpMyAdmin/config.inc.php
Tiếp theo mở file /usr/share/phpMyAdmin/config.inc.php
nano /usr/share/phpMyAdmin/config.inc.php
– Tìm
$cfg['blowfish_secret'] = '';
thêm một đoạn ký tự bất kỳ vào giữa cặp nháy đơn. Ví dụ:
$cfg['blowfish_secret'] = 'dsa123e12rwDSADs1few12tr3ewg3s2df3sAD';
– Tiếp theo thêm vào cuối file doạn code sau
$cfg['TempDir'] = '/usr/share/phpMyAdmin/tmp/';
Bấm Ctrl + o và nhấn Enter để lưu file, bấm Ctrl +x để thoát khỏi nano. Sau đó các bạn cần tạo thư mục tmp cho PhpMyAdmin
mkdir -p /usr/share/phpMyAdmin/tmp
chown -R nginx:nginx /usr/share/phpMyAdmin/tmp
4. Cấu hình vhost cho PhpMyAdmin
Để có thể truy cập được PhpMyAdmin các bạn sẽ cần tại vhost cho nó. Tạo file /etc/httpd/conf.d/phpmyadmin.conf với nội dung sau
Alias /pma /usr/share/phpMyAdmin
Alias /phpmyadmin /usr/share/phpMyAdmin

<Directory /usr/share/phpMyAdmin/>
    AddDefaultCharset UTF-8
    <IfModule mod_authz_core.c>
    # Apache 2.4
    <RequireAny>
        <RequireAll>
            Require all granted
        </RequireAll>
    </RequireAny>
    </IfModule>
    <IfModule !mod_authz_core.c>
        # Apache 2.2
        Order Deny,Allow
        Deny from All
        Allow from All
        Allow from ::1
    </IfModule>
</Directory>
<Directory /usr/share/phpMyAdmin/log/>
    Order Deny,Allow
    Deny from All
    Allow from None
</Directory>
<Directory /usr/share/phpMyAdmin/libraries/>
    Order Deny,Allow
    Deny from All
    Allow from None
</Directory>
<Directory /usr/share/phpMyAdmin/templates/>
    Order Deny,Allow
    Deny from All
    Allow from None
</Directory>
<Directory /usr/share/phpMyAdmin/tmp/>
    Order Deny,Allow
    Deny from All
    Allow from None
</Directory>
Khởi động lại apache để load cấu hình
systemctl restart httpd
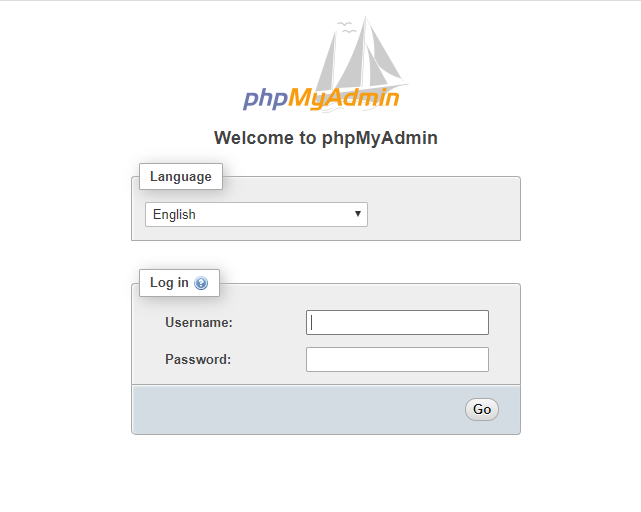
5. Truy cập phpMyAdmin
Để truy cập giao diện phpMyAdmin, hãy mở trình duyệt của bạn và truy cập http://ip-vps/phpmyadmin:
6. Kết luận
Qua bài viết này VINASTAR dã hướng dẫn các bạn cài đặt phpMyAdmin với Apache trên CentOS 7. Nếu có bất kỳ ý kiến đóng góp nào các bạn có thể để lại bình luận ở bên dưới.